Blog by Stanley Sequeira | Oct 20, 2015
The Salesforce Lightning Design System is a neat way to design Apps in Salesforce Lightning. The good thing about this is Salesforce has given the CSS and done all the heavy lifting to make our apps look elegant. The new Design System is expected to reduce the development time significantly with faster time to market apps.
The Lightning Design System unveils quite a powerful pack of rich features and we’ll try to explore each and every feature in subsequent blogs.
Here in this post, we’ll see how we can use the feature pack to display a list of Opportunities on a Visualforce Page.
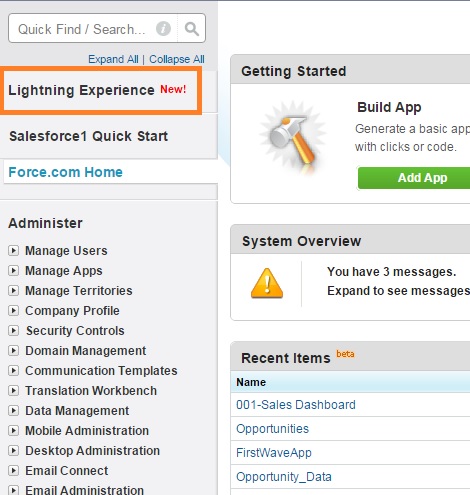
But First things First, if you’ve not enabled Lightning Experience yet, you need to do this like this –It’s as easy as turning the Switch ON. You can click on Lightning Experience in the Setup Menu
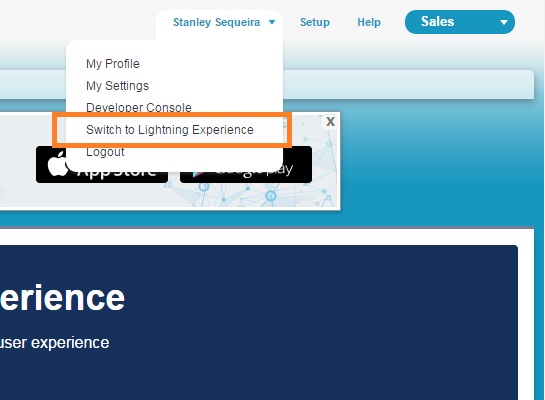
Once you’re click, preferably select ‘Enable’ for all options on the screen. Next you can click on your Name and Click Switch to Lightning Experience.
And that’s it. Welcome to the WORLD of Lightning! It’s FAST, easy and elegant.
Before you can actually get hands onto the Lightning Design Systems, you need to prepare your ORG for it.
Setting up the ORG
Step 1: Download the Static Resource here
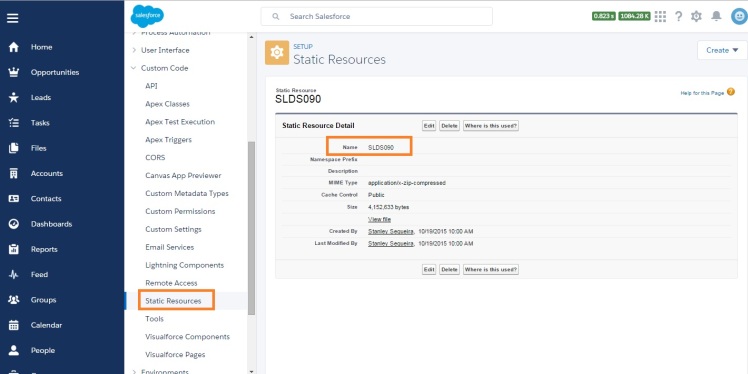
Step 2: Search for Static Resources in Setup Menu (Custom Code à Static Resources) and Click New
Step 3: Enter the Name as SLDS090 and choose the file you downloaded from Step 1. Select Cache Control as ‘Public’
Great Job! You’re now ready to create your Visualforce Page.
Creating your Visualforce Page
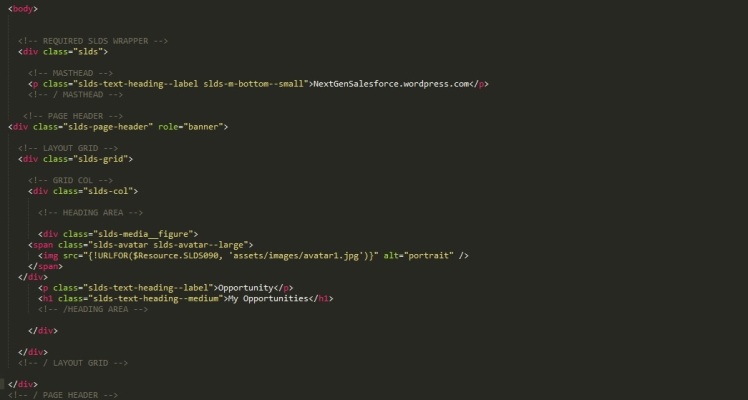
Step 1: Creating the header and adding an Avatar
In the <BODY> section you need to define the Page Headers, add avatars to your object by selecting the standard images from the static resources. There are a lot to choose from. Just navigate the downloaded file to /assets/images and there is a whole bunch to choose from
Step 2: Creating the Opportunities View
You now need to add the standard / custom object to the <APEX:REMOTEOBJECTS> tag. In this case we’ll use Opportunities
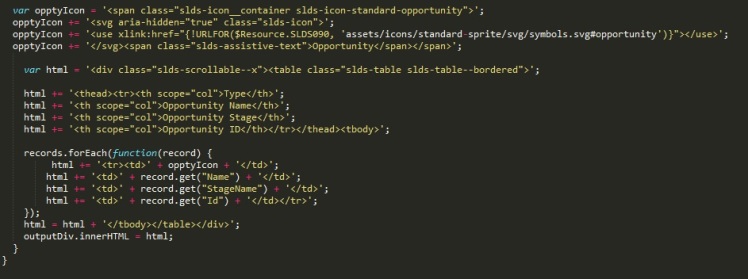
Step 3: Then you need to add a Javascript in the <SCRIPT> section for the layout design
In this example, what we’re trying to do is add the following columns –
- Type
- Opportunity Name
- Opportunity Stage
- Amount
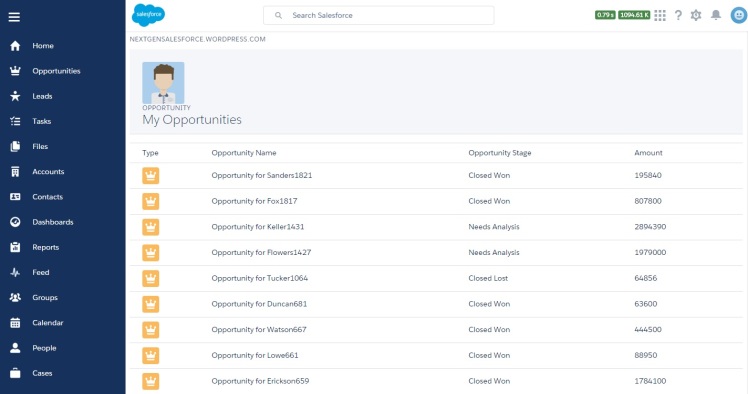
Tadaa .. the VF page looks like this –
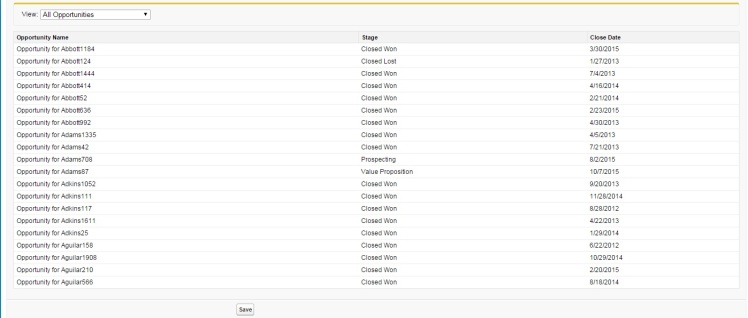
So if you compare this page with a very similar implementation on Salesforce Classic
It’s a huge improvement in terms of look and feel of the page with the new Design System. Plus its responsive design is compatible with mobiles, tablets and watches.
Here you can download the OpportunitiesPage



Thanks for sharing this .. good info
LikeLike
Good info .. thanks
LikeLike
Good Post
LikeLike
Thanks for the post. Great info.
LikeLike